Create and Edit Your Own
E-Commerce Templates
Use the Template Editor to create your own templates and edit existing templates.
The Template Editor supports a wide variety of field types, including fields for: editable text, static text, image upload, static images, image lists, rectangles, circles, lines and more. Template have field settings that control which fields and field values users can edit. For example, whether fields are moveable and and fonts and font sizes are pre-defined or editable can all be configured via the Template Editor. Easily add new fields, delete fields or change field settings. You can also change the name and size of a template.
Template Manager
To access the Template Manager:
1. Click on your name in the upper right. A dropdown menu will appear.
2. Select Administration.
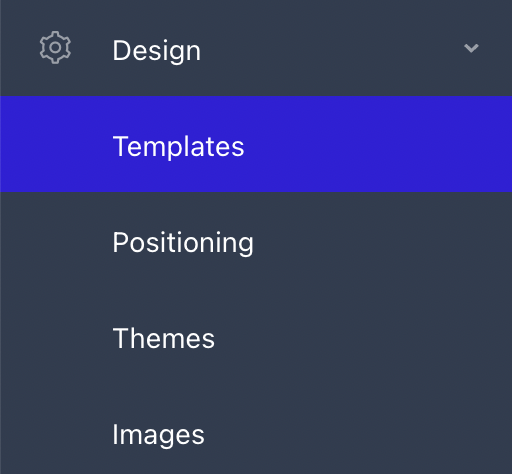
3. In the left-hand navigation bar, click on Design, and then on Templates.

Create Template
To create a new template:
1. In the Template section (bottom half of page), select the Customer for which you want to create the template.
2. Click Create Template.
3. Enter the Name for the template, along with the width and height.
4. Optionally, specify a logo file for the template. If no logo file is specified, the name of the template will be used.
5. Click Create Template.
eEdit Template
1. Select the customer or channel containing the template you want to edit.
2. A list of templates for that customer will appear.
3. In the Actions column, click Edit.
System-provided templates are read-only. To make changes to a system-provided template, first make a copy of that template and then edit the copy.
Copy Template
1. Select the customer or channel with the template you want to copy.
2. Click the Copy button next to the template you want to copy.
3. A copy of the template will be created with the name _copy.
You can edit the name and dimensions of the template copy as described below.
Delete Template
1. Select the customer or channel with the template you want to delete.
2. Click the Delete button next to the template to delete. A warning popup will appear.
3. Click Yes to delete the template or No to cancel.
If you’re no longer using a template but are not ready to delete it, click Hide instead. The template will still be stored in the system, but hidden on the design creation page.
Template Editor
Template Name
1. In the list of templates, click Edit next to the template you want to edit. The Template Editor appears.
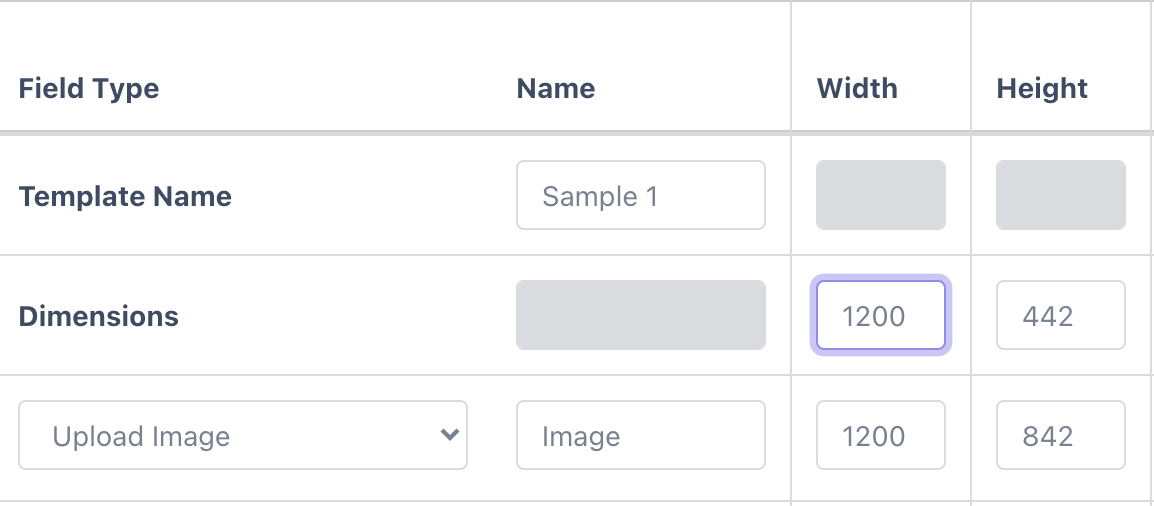
2. In the Template Name row, Name column, enter the new template name.
3. Scroll down and click Update Template to save the changes or Update & View Template to save your changes and view the updated template on the create page. Click Cancel to discard your changes.


Template Dimensions
1. To adjust the size of a template, in the Dimensions row, scroll to the right until the Width and Height columns are visible.
2. Enter new values for Width and Height.
3. Click Update Template or Update & View Template.

Template Preview
View the template in the Template Preview window:
1. Click and drag any object to change its position.
2. Or select an object and edit its position and size using the X, Y, Width and Height toolbar at the bottom of the preview window.
3. Save your changes using the Update Template or Update & View Template button.
Template Fields
To learn more about template fields, visit the Template Fields page.